UCCX provides three different users that can be used to access the database directly in order to extract information for the purposes of wallboard applications, Quality Management, Workforce Management, and custom historical reporting.
- uccxhruser: This user has access to many configuration and historical tables in the UCCX database and should only be used only for custom historical reporting and Cisco Unified Workforce Management (WFM).
- uccxworkforce: This user has access to the Team, Resource, and Supervisor tables and it’s used for Cisco Unified Quality Management (QM).
- uccxwallboard: This user has access to real-time database tables that contain snapshots of real-time statistics, specifically to tables RTCSQsSummary and RTICDStatistics.
For the purpose of this configuration we are going to use the uccxhruser.
Configuration
- First we need to download the IBM Informix Client SDK that will allow the client to establish the ODBC connection with the CCX DB. You can find the latest SDK directly from the IBM website but you will find an unpleasant registration process. In order to keep things simple you can download the IBM Informix Client SDK Install 4.10 TC7 right here, remember to run the installer executable with windows “admin” rights. By default 64 bit Windows runs the ODBC Administrator Utility 64 bit instead of the the one that we just installed (32 bit), this causes the IBM INFORMIX ODBC DRIVER option NOT to be visible, you can find the ODBC Administrator Utility 32 bit at ‘C:\Windows\SysWOW64\odbcad32.exe‘.
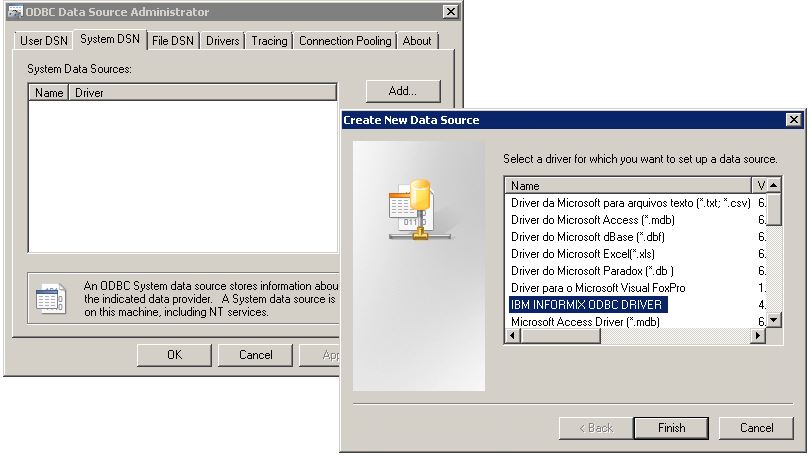
2. Now we will create a new “DSN” based on the information below:
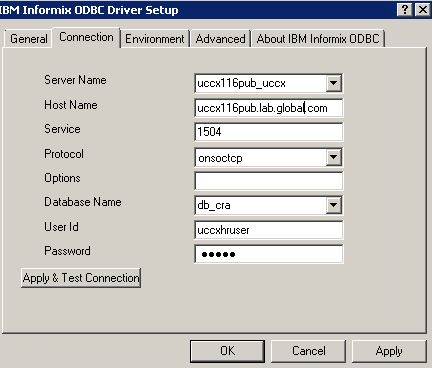
- Server Name: This is the name of the instance of the Informix database. There are specific rules for entering the name and they have to be followed:
- All upper-case letters to be converted to lower case
- Any hyphens to be converted to underscore
- If the hostname of the UCCX begins with a number, add “i” in fornt of it.
- Add “_uccx” to the end of the hostname.
For example:
Hostname: UCCX116PUB = Servername will be “uccx116pub_uccx”
Hostname: UCCX116PUB-1 = Servername will be “uccx116pub_1_uccx”
Hostname: 1-uccx116pub. The servername will be “i1_uccx116pub_uccx”
- Hostname: The actual hostname or IP address of the UCCX
- Service: 1504
- Protocol: onsoctcp
- Options: leave it blank
- Database name: db_cra
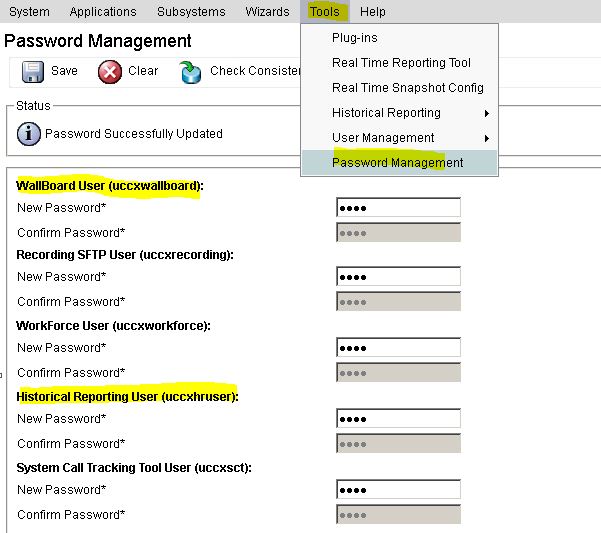
- UserID: The wallboard user or uccxhruser
- Password: Password of the username (reset from the password management page)
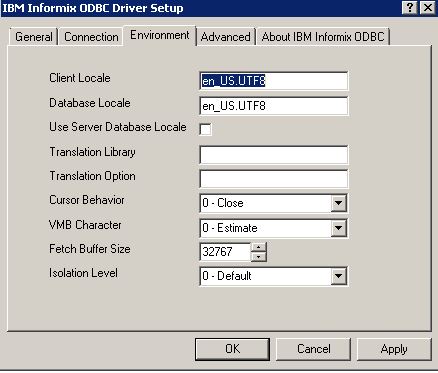
- Client Locale: en_US.UTF8
- Database Locale: en_US.UTF8
3. Click on “Apply and Test Connection” and ensure the connection is successful.

There are many clients available on the web, on this guide I will use the Server Studio from AGS which is a free client and you can download it here.
